Why Bother Cleaning Your Inflatable Tent Anyway?
Look, I get it. You’ve just come back from an amazing camping trip, you’re exhausted, and the last thing you want to do is deal with a dirty tent. But here’s the thing—your inflatable tent is basically your home away from home, and just like your actual house, it needs some TLC to stay in good shape.
Inflatable tents are awesome. They’re quick to set up, super comfortable, and honestly, they make you feel like you’re glamping even when you’re just regular camping. But because they rely on air beams instead of traditional poles, they need a bit of special attention when it comes to cleaning and maintenance. Ignore this, and you might find yourself with a tent that smells like a wet dog, has mold growing in weird places, or—worst case scenario—develops a leak that ruins your next adventure.
So yeah, cleaning your inflatable tent isn’t the most exciting task, but trust me, it’s worth it. Let’s dive into how to do it right without losing your mind.
When Should You Clean Your Tent?
After Every Trip (The Quick Clean)
You don’t need to go full deep-clean mode after every single camping trip, but you should definitely do a basic cleanup. Shake out any dirt, leaves, or mysterious crumbs that have accumulated. Check for any obvious stains or muddy spots. If it’s just a bit dusty, you’re probably good to go until the next trip.
The Deep Clean (Every Few Months or Seasonally)
If you’ve been camping in muddy conditions, near the beach (hello, sand everywhere), or if your tent has been stored away for a while, it’s time for a proper wash. Also, if you notice any weird smells, discoloration, or sticky spots, don’t wait—clean it now before it gets worse.
Before Long-Term Storage
This is crucial, folks. Never, and I mean never, store your inflatable tent dirty or damp. That’s just asking for mold, mildew, and a whole lot of regret when you pull it out next season.
What You’ll Need
Before we get into the nitty-gritty, let’s gather our supplies. You don’t need anything fancy or expensive:
- Mild soap: Think dish soap or a gentle laundry detergent. Nothing harsh or abrasive.
- Soft sponge or cloth: Microfiber works great. Avoid anything scratchy.
- Soft-bristled brush: An old toothbrush is perfect for those stubborn spots.
- Clean water: Obviously.
- Towels: For drying.
- A large, clean space: Your backyard, a garage, or even a spacious bathroom works.
What you absolutely should NOT use:
- Bleach or harsh chemicals (they’ll damage the fabric)
- Pressure washers (too aggressive)
- Washing machines (just don’t)
- Abrasive scrubbers (say goodbye to your waterproof coating)
Step-by-Step: The Cleaning Process
Step 1: Set It Up (But Don’t Inflate It Fully)
Here’s a pro tip: you want to clean your tent when it’s partially inflated or laid out flat. If it’s fully inflated, you’ll struggle to reach all the nooks and crannies. If it’s completely deflated, you’ll be fighting with fabric folds and creases. Find that sweet spot where the fabric is taut but not under full pressure.
If you have the space, laying it out on a clean tarp or grass (make sure the ground is clean first!) works best. This gives you full access to every surface.
Step 2: Shake It Out and Vacuum
Start by removing any loose debris. Turn the tent upside down, shake it vigorously, and get rid of leaves, twigs, sand, and whatever else has hitched a ride. If you have a handheld vacuum or a vacuum with a brush attachment, go over the interior and exterior gently. This prevents you from just smearing dirt around when you start washing.
Step 3: Spot Clean First
Before you start washing the whole thing, tackle any obvious problem areas. Mud stains, bird droppings (yep, it happens), food spills—address these first. Mix a small amount of mild soap with water and use your soft brush or sponge to gently work on these spots. Don’t go crazy with the scrubbing; let the soap do the work.
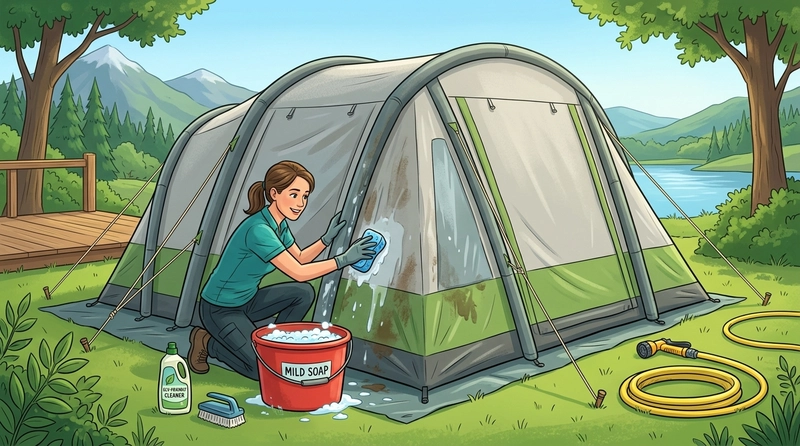
Step 4: The Main Wash
Now for the main event. Fill a bucket with lukewarm water and add a small amount of mild soap. You don’t want bubbles everywhere—just enough to get the job done.
Using your soft sponge or cloth, start washing the exterior of the tent. Work in sections so you don’t miss anything. Pay special attention to high-traffic areas like the entrance, the base where it touches the ground, and anywhere you’ve noticed dirt buildup.
For the interior, be extra gentle. The inside fabric is often treated differently and can be more delicate. A simple wipe-down with a damp, soapy cloth is usually enough unless you’ve had a major spill.
Step 5: Rinse Thoroughly
This is where a lot of people mess up. You need to rinse off all that soap. Residual soap can attract dirt, affect the fabric’s breathability, and even damage waterproof coatings over time.
Use clean water and a fresh sponge or cloth to wipe away the soap. You might need to go over areas a couple of times. If you have access to a garden hose with a gentle spray setting, that can work too—just keep the pressure low and don’t blast any seams directly.
Step 6: Dry It Completely (This Is Non-Negotiable)
I cannot stress this enough: your tent must be 100% dry before you even think about packing it away. Any moisture left behind is an open invitation for mold and mildew, and once those set in, they’re a nightmare to get rid of.
Set up your tent in a shaded, well-ventilated area. Direct sunlight might seem like a good idea for quick drying, but UV rays can degrade the fabric over time. If you can, leave it up for several hours or even overnight. Feel the fabric—especially in corners, seams, and around the air beams—to make sure there’s no dampness anywhere.
If you’re in a hurry (though I really recommend not rushing this), you can use towels to pat dry surfaces and speed things up a bit.
Special Situations and Problem Solving
Dealing With Mold or Mildew
Uh oh. You’ve opened your tent and there’s that telltale musty smell, or worse, visible black or green spots. Don’t panic—it’s fixable if you catch it early.
Mix one part white vinegar with four parts water. Yes, vinegar. It’s a natural antifungal and won’t harm your tent fabric. Apply this solution to the affected areas and let it sit for about an hour. Then gently scrub with your soft brush and rinse thoroughly. You might need to repeat this for stubborn spots.
Once it’s clean, dry it completely in sunlight (this is the one time direct sun is helpful) to kill any remaining spores. If the smell persists after cleaning and drying, you might need to repeat the process or consider a specialized tent cleaner.
Removing Stubborn Stains
Tree sap, grease, or that mysterious stain that appeared out of nowhere? Try a small amount of rubbing alcohol on a cotton ball. Test it on an inconspicuous area first to make sure it doesn’t affect the color or coating. Gently dab at the stain—don’t rub aggressively.
For really tough stains, there are commercial tent cleaners available, but honestly, mild soap and patience usually do the trick.
Cleaning the Air Beams
The inflatable beams are the heart of your tent, so treat them with respect. Wipe them down with a damp cloth during your regular cleaning. Check the valves while you’re at it—make sure they’re free of dirt and debris that could prevent a good seal.
Never use sharp objects near the beams, and if you’re cleaning around the valve areas, be gentle. Those valves are crucial for keeping your tent standing.
Maintenance Tips to Keep Your Tent Cleaner Longer
Use a Footprint or Groundsheet
This is a game-changer. A footprint (basically a custom-sized tarp that goes under your tent) protects the bottom from abrasion, moisture, and dirt. It’s much easier to shake out and clean a separate groundsheet than to scrub the bottom of your tent.
Keep Shoes Outside
I know, I know—it’s tempting to bring your boots inside when it’s raining. But establish a “shoes off at the door” rule. Your tent floor will stay so much cleaner, and you’ll track in way less dirt.
Ventilate Properly
Condensation is the enemy of a clean tent. Make sure you’re using all the ventilation options your tent offers. This reduces moisture buildup inside, which means less chance of mold and less need for intensive cleaning.
Address Spills Immediately
Dropped your coffee inside the tent? Clean it up right then and there. The longer a stain sits, the harder it is to remove. Keep a small cleaning cloth or wet wipes in your camping kit for quick fixes.
Storing Your Inflatable Tent
Cleaning is only half the battle—proper storage is what keeps your tent ready for action.
Once your tent is completely dry, deflate it fully. Don’t just open the valves and walk away; actively push out as much air as possible. This makes packing easier and prevents stress on the fabric and seams.
Fold or roll your tent loosely. Don’t cram it into its stuff sack like you’re trying to win a packing contest. Tight compression over long periods can damage the fabric and the air beams. If you have the space, storing it flat in a larger storage bag or bin is even better.
Store it in a cool, dry place. Avoid attics that get super hot, damp basements, or anywhere with temperature extremes. UV light is also a no-no for long-term storage, so keep it away from windows.
Troubleshooting Common Issues
My Tent Smells Weird Even After Cleaning
Sometimes odors linger in the fabric. Try sprinkling baking soda on the interior surfaces, letting it sit for a few hours, then vacuuming it out. You can also hang the tent up in fresh air for a day or two—sometimes it just needs to breathe.
The Fabric Feels Sticky After Cleaning
You probably didn’t rinse thoroughly enough. Set the tent up again and go over it with clean water and a fresh cloth. That sticky feeling is usually soap residue.
I See White Chalky Spots on the Fabric
This could be the waterproof coating breaking down, or it might just be dried soap or mineral deposits from hard water. Try rinsing the area again. If it doesn’t go away and the fabric feels different in that spot, you might need to reapply a waterproofing treatment.
Final Thoughts
Cleaning your inflatable tent isn’t rocket science, but it does require some care and attention. Think of it as an investment in your future camping adventures. A well-maintained tent will last for years, keeping you comfortable and dry on all your trips.
The key takeaways? Clean it regularly but gently, dry it completely, store it properly, and address problems as soon as you notice them. Do this, and your inflatable tent will be your reliable companion for countless adventures to come.
Happy camping, and may your tent always be clean, dry, and ready for the next great outdoors experience!
